Configuring a FortiGate firewall for basic internet access is one of the first steps when deploying a new firewall. While FortiGate is a powerful security device, many internet access issues happen simply because one of the core configuration steps is missing or misconfigured.
In this guide, we’ll walk through a simple and clean FortiGate setup that allows users behind the firewall to access the internet reliably.
Before starting, make sure you have:
A FortiGate device with GUI access
An active internet connection from your ISP
One interface for WAN and one for LAN
Admin access to the FortiGate
This guide assumes a basic LAN → Internet setup.
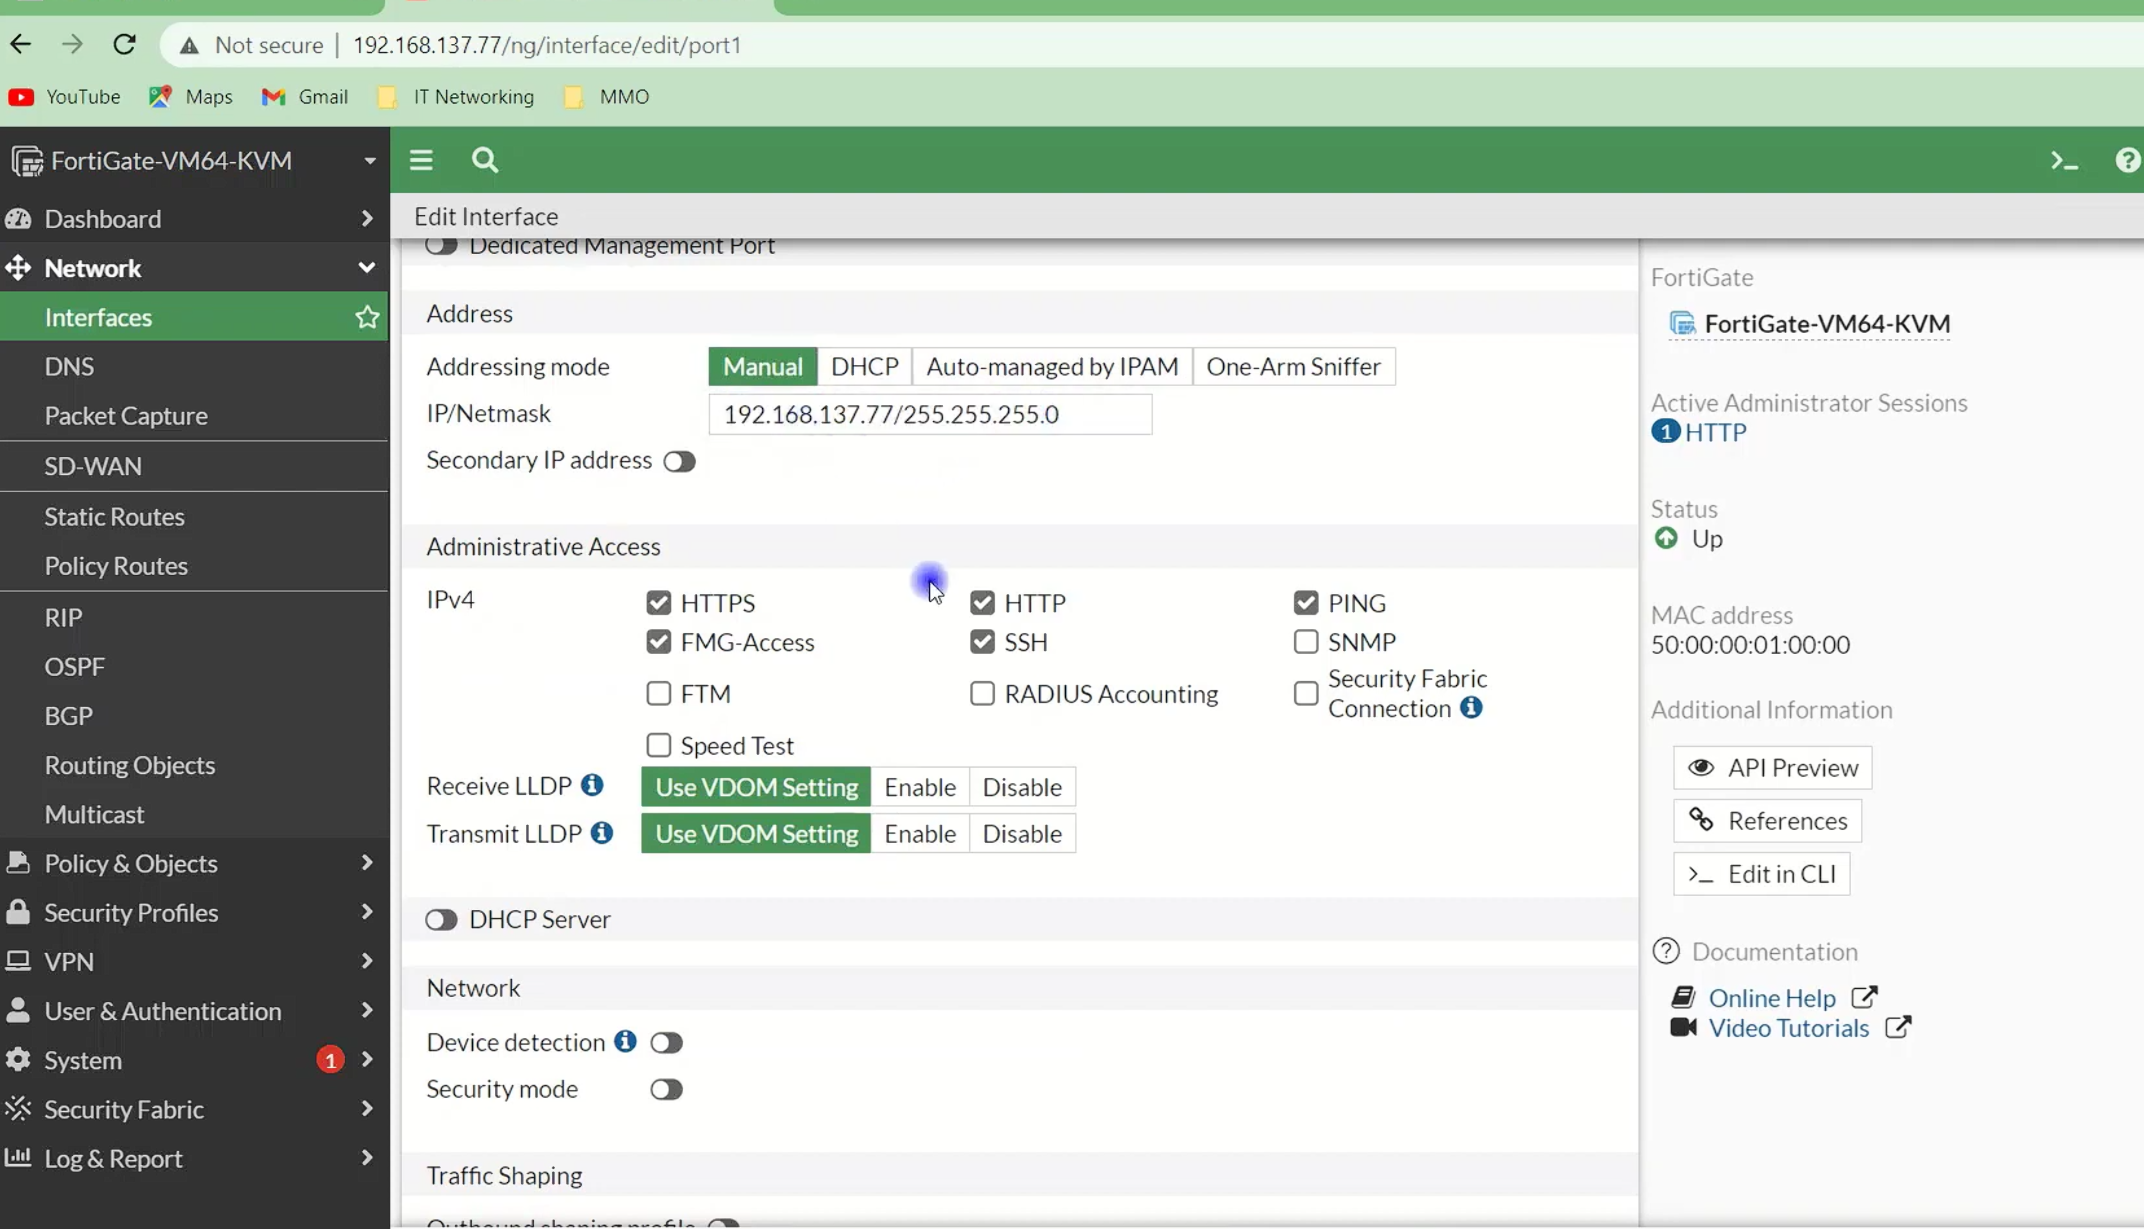
The WAN interface connects FortiGate to the internet.
Go to Network → Interfaces
Edit the WAN interface
Set addressing method:
DHCP (most ISPs)
Or Static IP (if provided by ISP)
Enable Ping and HTTPS for testing (temporarily)
Make sure the WAN interface receives an IP address.
The LAN interface connects internal users.
Assign a private IP address (example: 192.168.1.1/24)
Enable DHCP Server on the LAN interface
Configure DNS servers (FortiGate or public DNS)
Clients should receive IP, gateway, and DNS automatically.
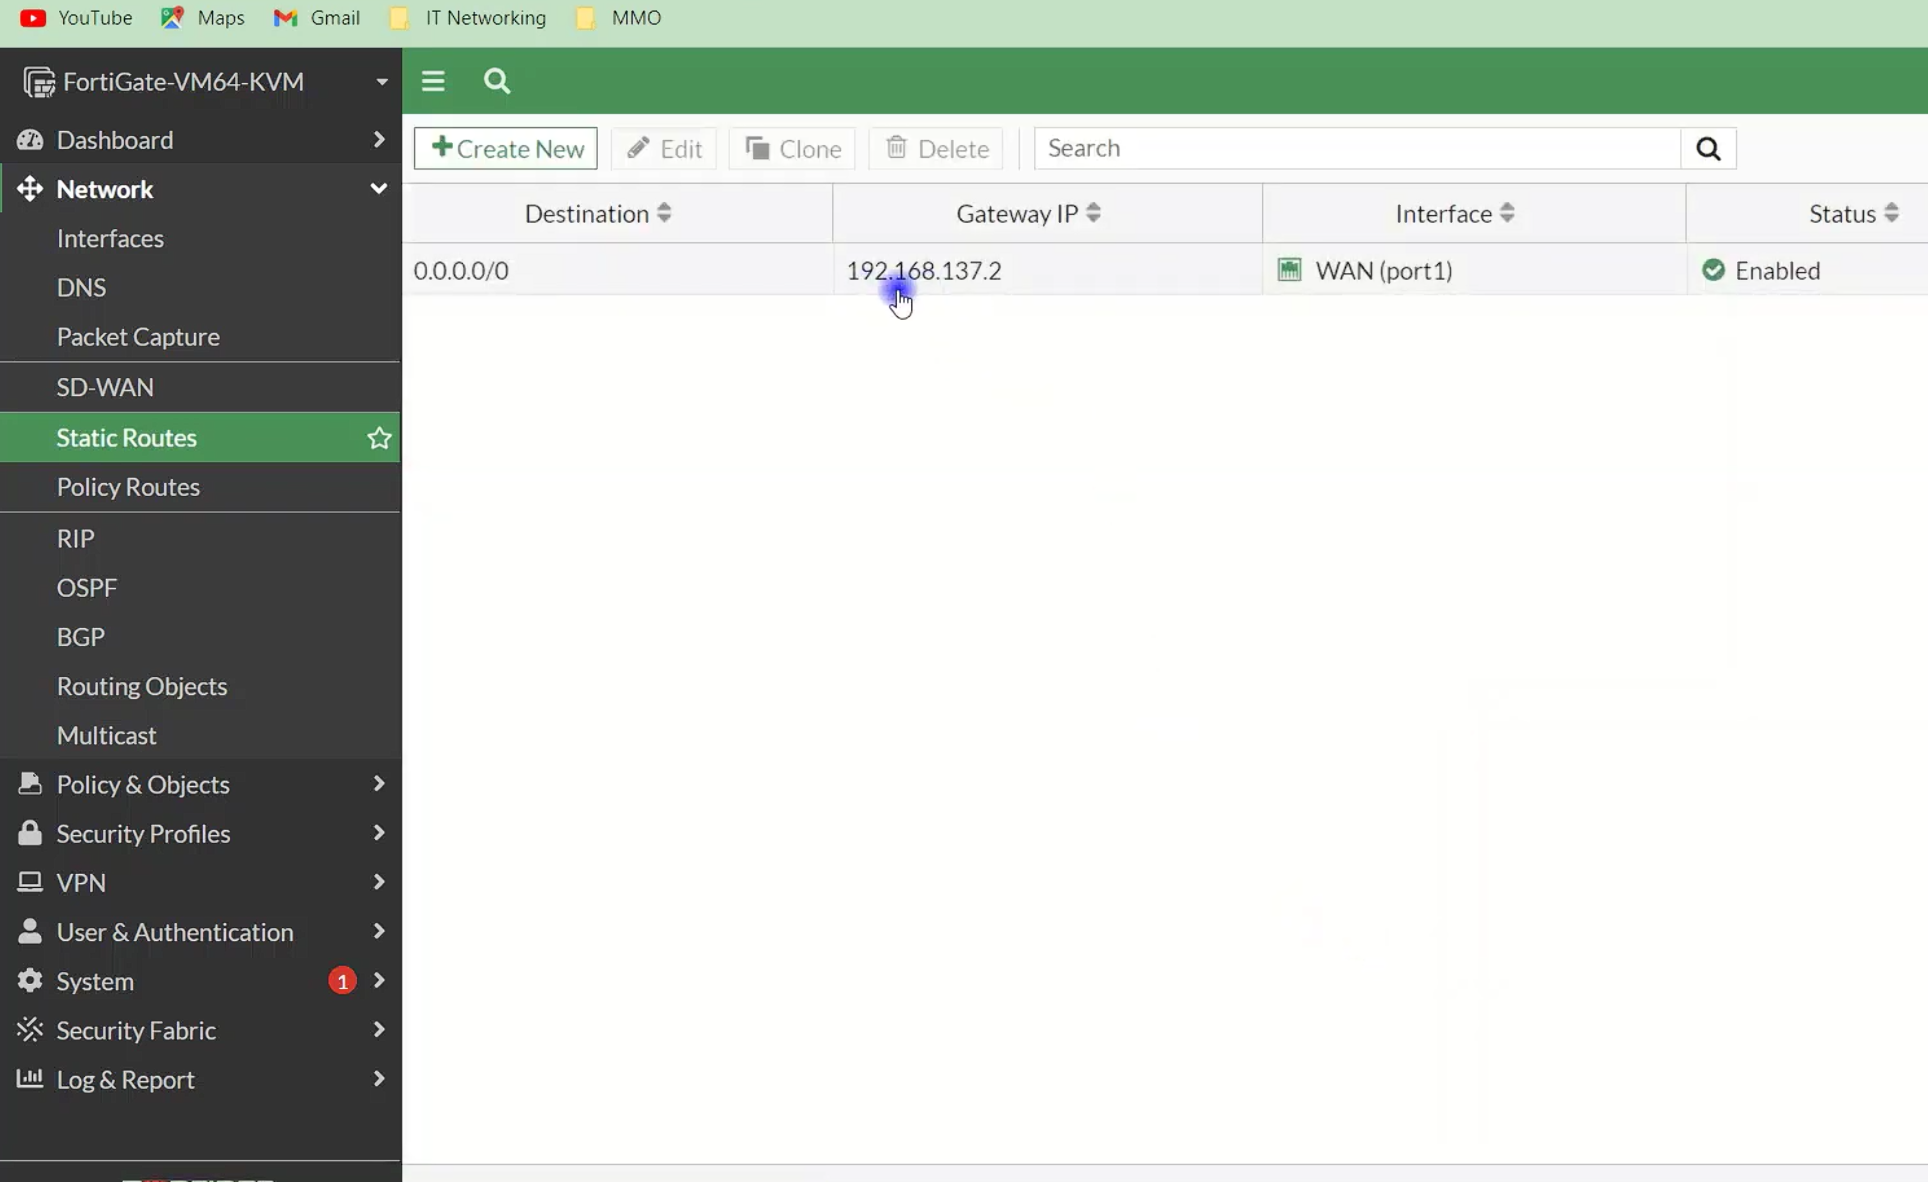
Without a default route, internet access will fail.
Go to Network → Static Routes
Confirm a route exists:
This route tells FortiGate where to send internet traffic.
Firewall policies control traffic flow.
Incoming Interface: LAN
Outgoing Interface: WAN
Source: LAN subnet
Destination: all
Service: ALL
Action: ACCEPT
NAT: ENABLED
Logging: Enabled (recommended)
⚠️ NAT must be enabled for internet access.
DNS issues often look like “no internet”.
Use FortiGate as DNS server
Or configure public DNS:
8.8.8.8
1.1.1.1
Make sure DHCP provides correct DNS to clients.
After configuration:
Ping 8.8.8.8 from a client
Try browsing a website
Check policy logs for allowed traffic
Logs help confirm traffic is matching the correct policy.
NAT not enabled
Wrong interface direction
Policy order incorrect
DHCP not configured
DNS missing
Firewall policy missing
Wrong source or destination object
Interface mismatch
Policy placed below deny rules
Keep initial setup simple
Enable logs during testing
Comment firewall policies
Avoid unnecessary features during first setup
A clean baseline configuration prevents future issues.
Configuring basic internet access on a FortiGate firewall is straightforward when the fundamentals are applied correctly: interfaces, routing, policy, and NAT. Most issues occur when one of these steps is skipped or misconfigured. Starting with a clean and simple setup makes troubleshooting easier and builds a solid foundation for advanced security features later.
Dec 25, 2025
Dec 23, 2025

Dec 23, 2025

Dec 25, 2025
Dec 25, 2025

By clicking the button, you are agreeing with our Term & Conditions